Windows Installation Guide
Diffrence in Types:
Crafty offers two different types of Windows install. Each one provides certain advantages and disadvantages. Please make sure you read through these before making a decision about which version to install.
| Crafty Portable | Windows Service |
|---|---|
| BEST FOR BEGINNERS ✅ | Preferred install method for Windows Server. |
| Easy to install/update. | More involved/complicated installation with prerequisite dependency installs required. |
| Runs by double clicking on an exe. | Can be set to automatically boot on server startup without a user login. |
| Runs in the forground with accesiblity to Crafty terminal for password resets, etc. | Does not have direct access to Crafty's terminal output making password resets more involved. |
| Requries minimal technical knowledge or expertise. | Can be run in the background. |
Crafty Portable
Running Crafty Portable
- Download the most recent Windows Package from https://gitlab.com/crafty-controller/crafty-4
- Unzip the file downloaded by right clicking on the file and pressing "Extract All".
- Copy the unzipped directory OUT OF your Downloads folder to your Documents folder.
- Double click on Crafty.exe contained in that unzipped directory to start it.
Updating Crafty Portable
Make sure to stop Crafty before updating (Ctrl+C)
The Windows Portable build comes with an updater packaged with it, simple as launching the updater and following the prompts 🚀
Crafty Windows Service beta
A .Net based Windows Service to run Crafty as a service on Windows
Contents of the package
| File | Description |
|---|---|
| IntallService.ps1 | PowerShell Script used to Install the Service on the computer |
| UninstallService.ps1 | PowerShell Script used to Uninstall the service on the computer |
| appsettings.json | Configuration file to modifiy some services settings (Installation Folder, Auto-Update, ...) |
| CraftyService.exe | The executable of the service (The one that does all the work) |
Install Steps
Requirements:
- Windows 10 or 11
- .NET 10 or Higher
- Python3
- Git
- Rust Cargo
- Internet Connection to download Crafty Files
Preparing with Installation Script:
- Download the latest Windows Service Package: Crafty 4 - Windows Service
- Start the
PowerShellconsole with administrator privileges. - Run the
InstallService.ps1script. - Firstly, it will create a user to run the service and asks for a password for this user. (Remember this for later)
- Then, it will asks if you want to start the service at Startup.
- And that's it for the Installation Script.
- The
PowerShellconsole can be closed.
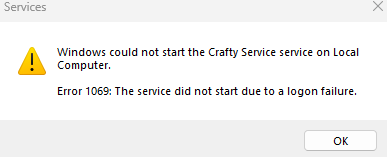
What to do if a login failure appears?
- Open the Services Manager.
- Go to the Crafty Service properties.
- In the connection tab, check if Crafty User is used for opening a session, if not fill in the crafty user credentials.
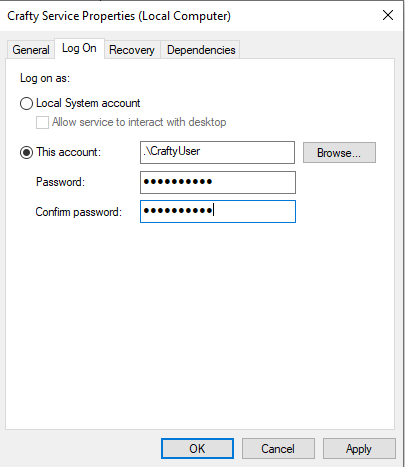
(you need to fill again the password you set earlier) 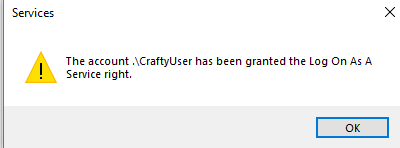
(You should recieve this messasge if successful) - You can now start the Crafty Service 🎉
Now Crafty Service is ready to run:
- Go in the Services manager
- Then you can Start the Crafty Service
Requirements:
- Windows 2016 or Higher
- .NET 10 or Higher
- Python3
- Git
- Rust Cargo
- Internet Connection to download Crafty Files
Preparing with Installation Script:
- Download the latest Windows Service Package: Crafty 4 - Windows Service
- Start the
PowerShellconsole with administrator privileges - Run the
InstallService.ps1script - Firstly, it will create a user to run the service and asks for a password for this user. (Remember this for later)
- Then, it will asks if you want to start the service at Startup
- And thats' it for the Installation Script
- The
PowerShellconsole can be closed
We need to grant the CraftyUser to run services in the Windows Group Policy:
This step is not needed if the prior step gives you a dialog box of adding the CraftyUser to it.
- Open the Group Policy Strategy Editor
- Go in Computer Config
- Then in Windows Settings
- Then in Security Settings
- Then in Local Strategies
- Then in User rights attribution
- You need to add the Crafty User at the
Open a session as a service
What to do if a login failure appears?
- Open the Services Manager.
- Go to the Crafty Service properties.
- In the connection tab, check if Crafty User is used for opening a session, if not fill in the crafty user credentials.
(you need to fill again the password you set earlier)
(You should recieve this messasge if successful) - Proceed to setup ➡️
Now Crafty Service is ready to run:
- Go in the Services manager
- Then you can Start the Crafty Service
Configuring the Service
In the Folder you have a configuration file named appsettings.json
The part you want to use is this one :
"Crafty": {
    "ServiceConfig": {
    "DefaultGitPath": "C:\\Program Files\\Git\\bin",
    "DefaultPythonPath": "C:\\Program Files\\Python3",
    "CraftyDirectory": "crafty-4",
    "AutoUpdate": true
    },
    "UserConfig": {
    "CraftyBranch":  "master"
    }
}
Updating Defaults
- If you installed Git in a different folder that the default one, you can set its path in the
DefaultGitPathfield. - If you installed Python in a different folder or have a different vertsion that the default one, you can set its path in the
DefaultPythonPathfield. - If you want to place Crafty in a different Directory that the Service Files, you can set its path in the
CraftyDirectoryfield. !! Not recommended due to Access Rights !! - You can configure if you want Crafty to be updated at the Service Startup in
AutoUpdatefield. - If you want to be with a specific branch of Crafty, you can set it in the
CraftyBranchfield. (Works only with master or dev branch for now.)
Updating the Service
Requirements:
- Rights on the folder containing the Crafty Service Files
- Download of the latests release of the Crafty Service
Update Steps:
- Stop the Crafty Service in the Service Manager
- Copy/Paste, the new files in place of the old ones
- Start again the Crafty Service in the Service Manager
Uninstall Steps
Don't forget to save your Minecraft Worlds before uninstalling!
Uninstallation Steps:
- Start the
PowerShellconsole with administrator privileges - Run the
UninstallService.ps1script - Firstly, it will remove the service from windows.
- Then, it will asks if you want to remove the CraftyUser
- And that's it for the Uninstallation Script
- The
PowerShellconsole can be closed - You can now delete your server files.
Post-Install
Excellent, by this point you should have successfully stood up your crafty instance!
Great work, You're ready to proceed to the next step 🎉
How to access the dashboard