User/Role Configuration
The user management panel is a central component of Crafty, providing administrators, managers and users with a selection tools to manage user accounts and permissions within the Crafty.
This document serves as a guide to effectively navigate and utilize the user management panel, enabling you to effortlessly handle user creation, roles, and permissions.
The User Management Panel
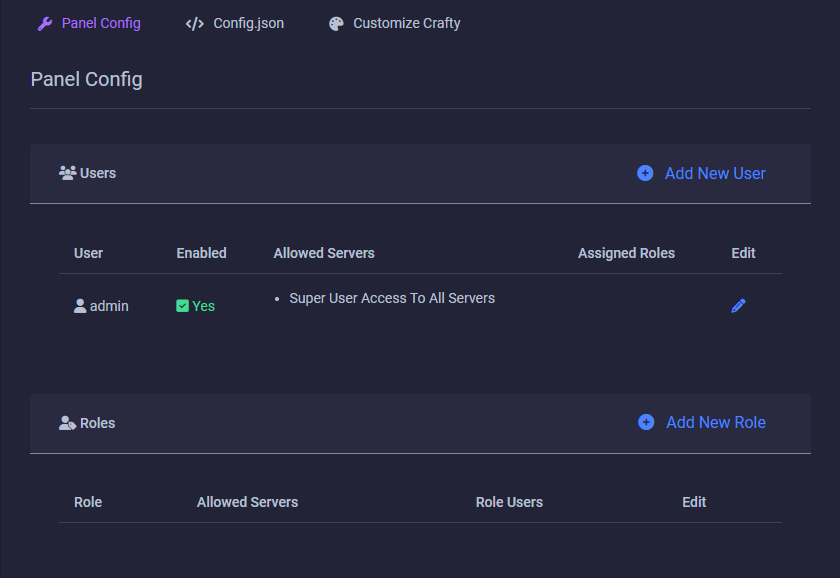
Getting to the User/Role Manager is incredibly easy all you have to do it click on Panel Settings in the navigation drawer.

Here we are able to Create new users and roles. Clicking the pencil icon next to a user or role will allow you to edit their respective config settings.
Adding a User
To create a user, Click Add New User

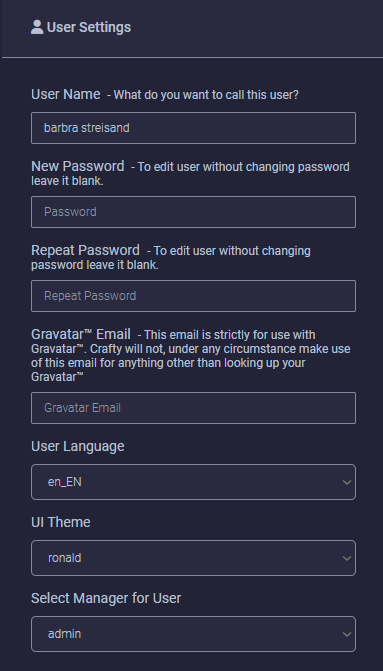
- Give the user a username.
- Give the user a password
(Password must be at least 6 characters, have a capital letter, a number and a symbol) - Repeat password
Gravatar Option
Crafty now has Gravatar integration.
You may input your Gravatar email address to add your icon.
This email is strictly for Gravatar use only.
Arcadia technology does not have access to this email whatsoever. It is stored locally in your database.
User language
To change your user language select it from the dropdown. If the language is disabled, it is due to the fact that it is incomplete. If you would like to become a translator and translate Crafty please open a ticket in our Discord.
Assign pre-existing role(s)

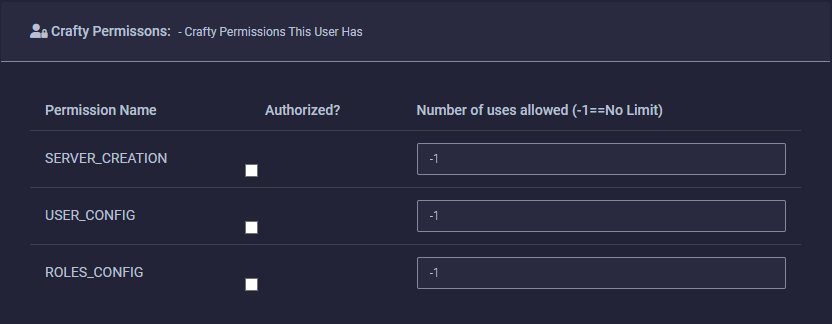
Crafty permissions
These variables limit the amount of resources that the user can create.

Allow the user to create servers. (If Quantity is -1 they can create an unlimited number of servers.)
Allow the user to create a user account. (If Quantity is -1 they can create an unlimited number of users.)
Allow the user to create a role. (If Quantity is -1 they can create an unlimited number of roles.)
For example, if you want this user to only be able to create 3 servers allocate them the quantity of 3
Superuser option
We HIGHLY recommend not creating additional super user accounts as they could in turn delete your user account and all servers.
They have ACCESS TO EVERYTHING ON YOUR CRAFTY INSTALLATION.
The Super user option is only displayed if the user creating a new user account is a Super User.
Adding a Role
Roles allow you to segregate access to certain servers and related server management options.
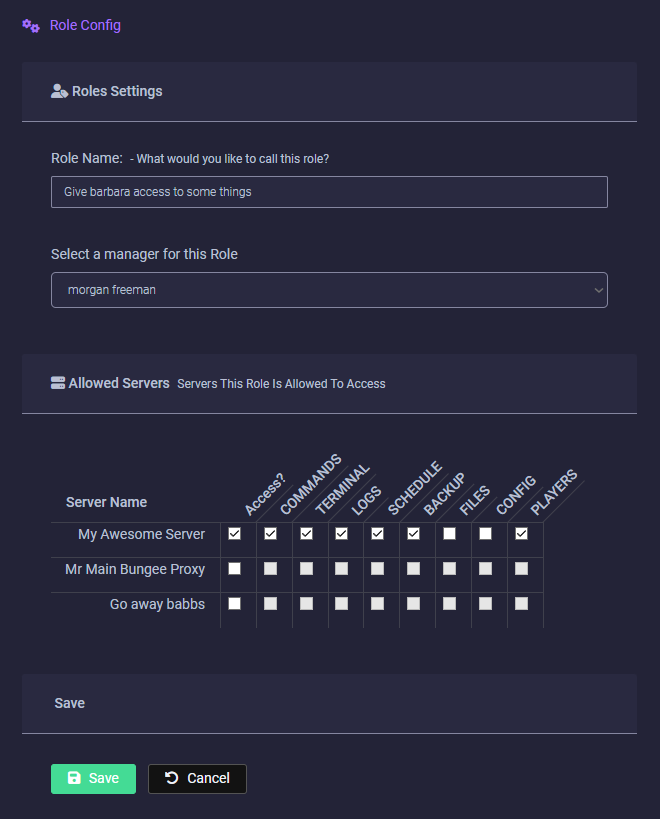
To create a role, Click Add New Role. Adding a role gives you many options to fine tune access.

Give your role a name, and select who you want to be able to manage this role (if any)
If you only want superusers to be able to manage this role leave manager unselected.
Now add the servers you want to attach to this role, check off options to allow this role to see different parts of the server specified. See the table below for descriptions of each area:
| Permission | Description |
|---|---|
| COMMANDS | Allows role to start/stop/restart server |
| TERMINAL | Allows role to access the terminal |
| LOGS | Allows role to access server logs |
| SCHEDULE | Allows role to be able to create/delete/edit and access schedules |
| BACKUP | Allows role to be able to create/delete/download/restore and access backups |
| FILES | Allows role to access files. This includes uploading/downloading/deleting/unzipping/renaming/creating/etc |
| CONFIG | Allows role to access server config. As a basic user this only gives them access to minimal configurations |
| PLAYERS | Allows role to access player config. This allows them to OP, Kick, Ban, etc |