Time-based one-time password (MFA)
MFA adds a second factor of authentication, ensuring that only authorized users with both the correct password and a unique one-time code can access Crafty. In this guide, we’ll walk you through enabling, configuring, and using MFA on your Crafty instance.
Prerequisites 4.4.8
- Ensure Crafty Controller is at version 4.4.8 or later.
- Make sure your server has internet access or can handle time sync properly.
- An authenticator app (e.g. Google Authenticator, Authy, Microsoft Authenticator).
Enabling MFA in Crafty
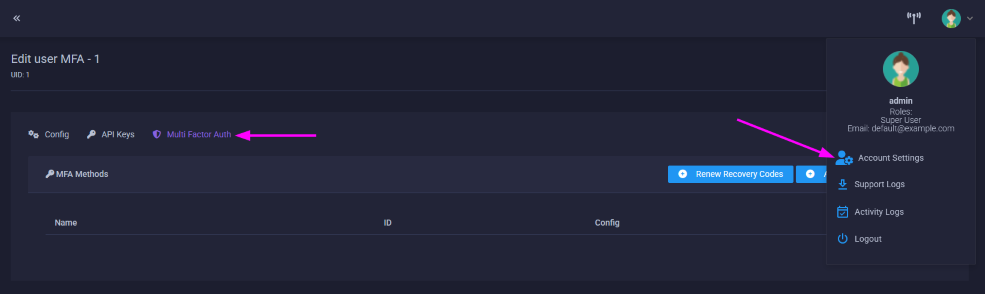
Accessing MFA Settings
- Click your user profile in the top right corner (top left on mobile).
- Click "Account Settings".
- Click the "Multi Factor Auth" tab
Generating a MFA Secret
- In the MFA tab click the "Add New Multi Factor Auth" button in the top right corner
- Give the MFA token a friendly name
- Scan the QR code with your phone's camera to add it to your authenticator app.
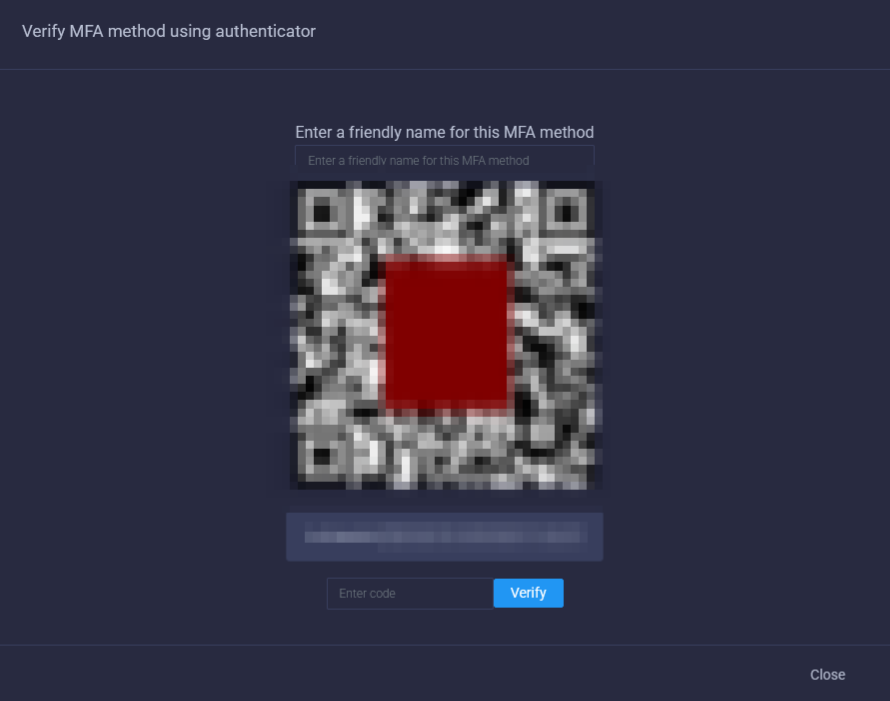
If your chosen authenticator app suports it, you can manually type in the secret.
Verification Step
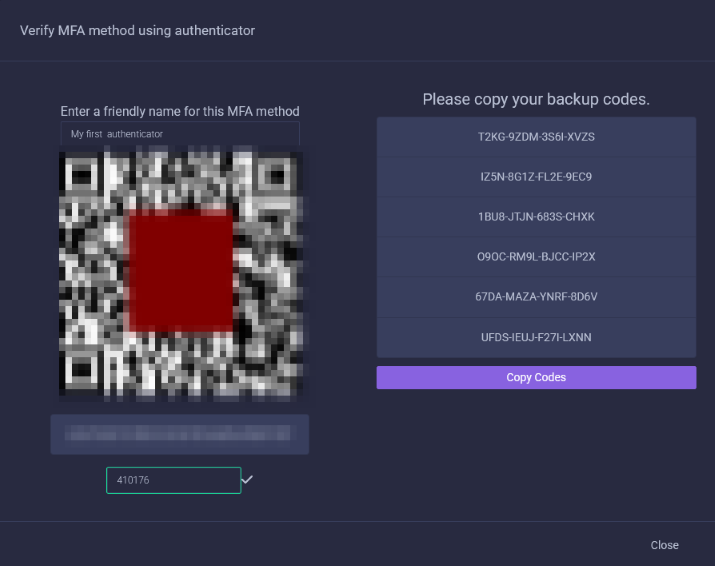
- Once in your authenticator app verify the rotating code by typing in the 6 digit code on your app into the Crafty input text box then press verify.
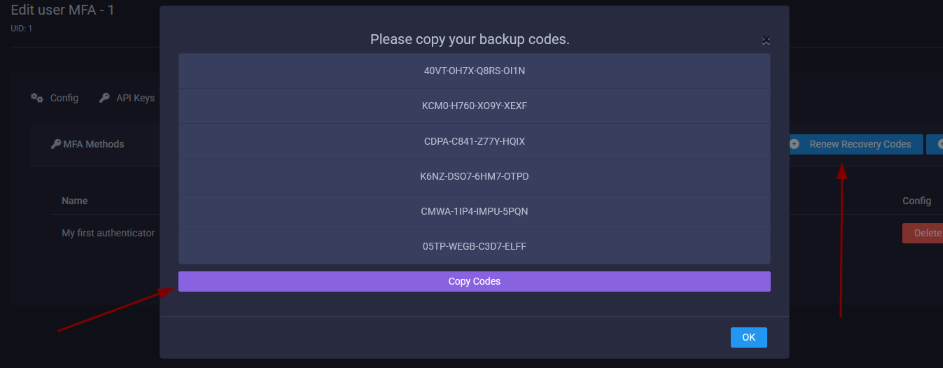
- Make sure to save your backup codes! Better safe, than sorry!
- Error handling if the code is incorrect or expired. (Having issues? See Troubleshooting)
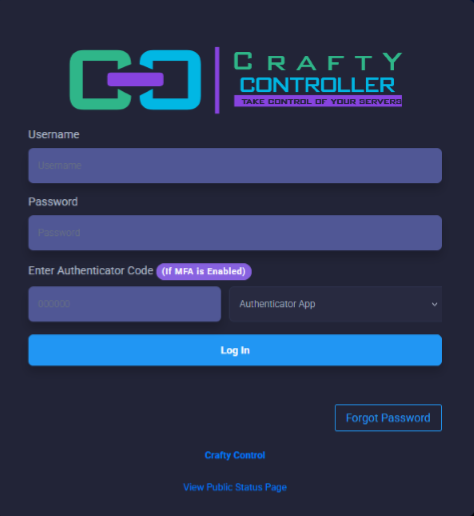
Using MFA at Login
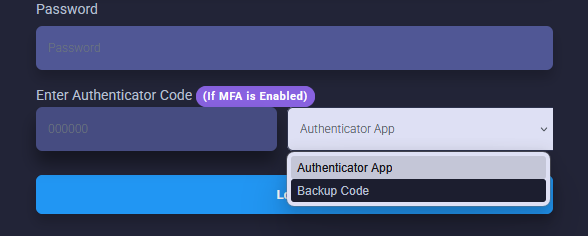
- If you have MFA enabled please enter your username, password, and 6 digit MFA token on the login screen.
- If you are using a backup code please be sure to change the dropdown from "authenticator app" to "backup code"
Requiring MFA for users
Super Users
- You can require all Super Users to have MFA enabled.
- Select "Panel Settings ⚙️" on the left side navigation (hamburger menu on mobile)
- Select the "config.json" tab
- Use the security menu and set "Require superusers to enable MFA" to True.

Roles
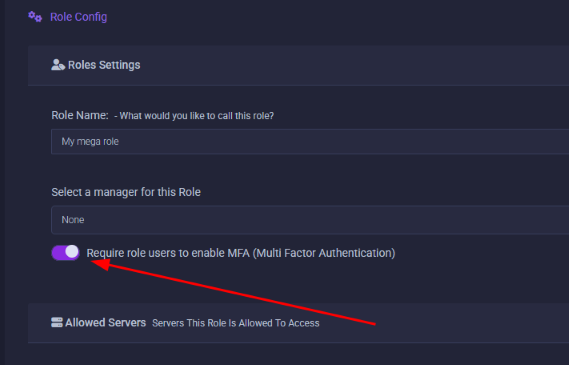
- You can require all users with an assigned role to enable MFA
- Click on "Panel Settings ⚙️" on the left side navigation (hamburger menu on mobile)
- Scroll to the "roles" section and click the edit pencil to edit a role or click create role
- In the menu that appears you select "Require role users to enable MFA (Multi Factor Authentication)"
Recovery and Backup Codes
- Optional but recommended for users who lose their MFA device.
- Backup codes are automatically generated when creating an MFA token.
- You can reroll 6 new backup codes by navigating to the MFA settings then clicking "Renew Recovery Codes".
- As the
anti-lockout-user(Recovery Account), you can reroll backup codes if a MFA device is lost.
Troubleshooting
- Common MFA errors: “Invalid code” “Code expired” could relate to time-sync issues.
- On Windows systems exact time is likely to not be in sync with your mobile device. You can enable "MFA Skew" in the
config.jsonsettings that will allow 1 previous code and 1 code in the future to be valid.
MFA FAQs
- “Can I use multiple devices for MFA?”
Yes! - “What if I lose my phone?”
You can reset your backup codes in the "anti-lockout-user" then login and create a new MFA token. If you are a lower priviledged user you can speak with the system administrator for help. - “Does MFA work offline?”
As long as the system time is correct MFA will work offline. - “Why am I getting an ‘Invalid Token’ error?”
Your system time is likely not exactly in sync with your mobile device's time.
Additional Resources
Links to Common Authenticator Apps
| App | URL |
|---|---|
| Google Authenticator | Google Play |
| Apple App Store | |
| Authy | Google Play |
| Apple App Store | |
| Microsoft Authenticator | Google Play |
| Apple App Store | |
| Yubico Authenticator | Google Play |
| Apple App Store | |
| Microsoft Store | |
| KeePass / KeePassXC | Microsoft Store |
| BitWarden | Google Play |
| Apple App Store | |
| Microsoft Store |